 Save
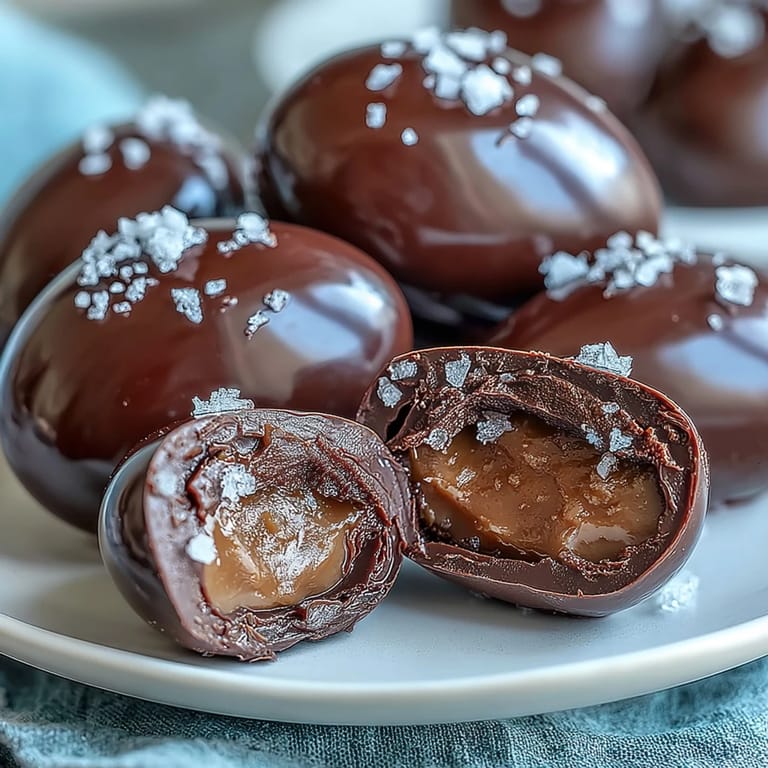
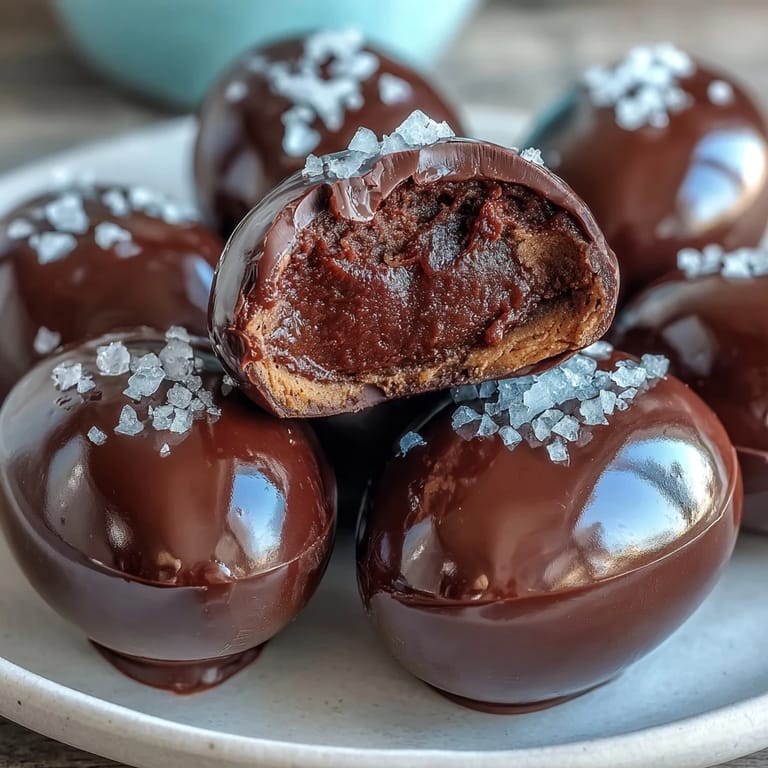
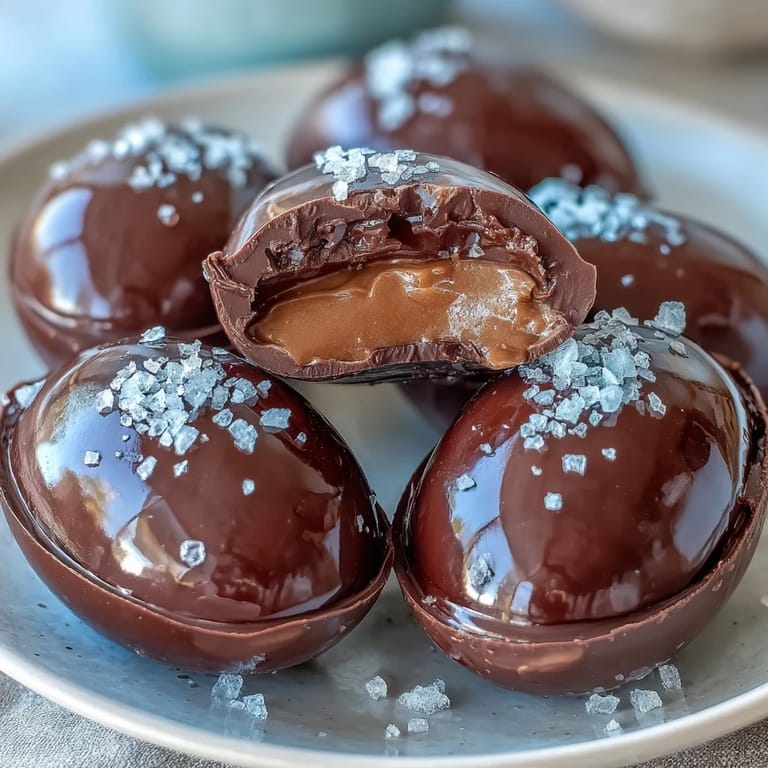
Save The first time I made these Dark Chocolate Peanut Butter Easter Eggs, the kitchen was filled with the unmistakable aroma of melting chocolate – rich and almost a little mischievous. I’d intended to make simple cookies, but after spotting a bag of Easter molds and a jar of peanut butter, my plans shifted as quickly as the weather outside. There’s something so satisfying about pressing together creamy peanut butter and powdered sugar, watching the mixture transform into a dough you can actually shape. I laughed when my hands got sticky shaping the eggs, but that made the process feel playful. It’s the sort of recipe that makes time pass differently – suddenly, the afternoon feels lighter and brighter.
Last year, these eggs became legendary after I brought them to a spring picnic – I watched my friends' expressions shift from curiosity to delight with each bite. The flaky sea salt on top was a magic touch, sparking chatter about what made them so craveable. Someone confessed to eating two before we’d even finished unpacking the rest of the basket. I ended up sharing the recipe right there, everyone scrambling for pens to jot it down. Sometimes, sharing food feels like sharing a happy secret.
Ingredients
- Creamy peanut butter: Choosing a brand with true roasted flavor makes these eggs memorable; smooth texture is key for shaping.
- Unsalted butter: Softened butter blends effortlessly into the filling, avoiding lumps and creating a silky center.
- Powdered sugar: For the sweetest, richest filling, sift the sugar to prevent any pesky clumps.
- Pure vanilla extract: A half teaspoon brings warmth and roundness – don’t skip, even if it seems subtle.
- Fine sea salt: A pinch tempers the sweetness, making the filling balanced rather than cloying.
- Dark chocolate (60–70% cocoa): The deeper cocoa notes pair beautifully with creamy peanut butter; chopping it helps melt quickly and evenly.
- Coconut oil (optional): Just a tablespoon softens the shell, making it glossy and easier to bite.
- Flaky sea salt: Sprinkle atop for a satisfying crunch and burst of flavor – don’t rush, do this step before chocolate sets.
Tired of Takeout? 🥡
Get 10 meals you can make faster than delivery arrives. Seriously.
One email. No spam. Unsubscribe anytime.
Instructions
- Prep the baking sheet:
- Lay out parchment paper so nothing sticks, and you can lift the eggs easily later.
- Mix the peanut butter filling:
- Blend peanut butter, softened butter, powdered sugar, vanilla, and salt together until thick and smooth – the sound changes as it comes together.
- Shape the eggs:
- Scoop out about two tablespoons of filling, and with your hands, roll and pinch it into an oval egg shape, then set on the baking sheet.
- Freeze for firmness:
- Pop the tray in the freezer for thirty minutes, which helps the eggs keep their shape for dipping.
- Melt the chocolate:
- Gently melt chocolate and coconut oil over simmering water or in the microwave, stirring until glossy and fluid.
- Dip the eggs:
- Use a fork to dunk each chilled egg in melted chocolate, letting excess drip back, then return it to the parchment.
- Sprinkle with sea salt:
- While the chocolate is still soft, quickly dust each egg with flaky sea salt so it sticks.
- Chill the finished eggs:
- Refrigerate until the chocolate sets, about fifteen minutes, and enjoy straight from the fridge or at room temp.
 Save
Save There was a quiet moment when we all paused between bites; somehow, these eggs had become more than candy. They sparked gentle laughter and conversation about making food together, which felt nourishing in its own way. Sometimes, a homemade treat is the heart of a gathering. I still remember my cousin saying she never knew peanut butter and chocolate could taste so grown-up. That little moment made me want to make them again and again.
How To Store And Serve Them
I’ve found these eggs taste best when chilled and served straight from the fridge – the snap of chocolate is so satisfying. Wrap leftovers tightly in an airtight container; they’ll stay fresh for about a week or freeze for a longer stash. If you want to impress, take them out ten minutes before serving so the centers soften just enough.
Fun Variations To Try
One afternoon, we tossed chopped roasted peanuts into the filling for extra crunch, and swapped coconut oil for a splash of olive oil for a slightly grassy flavor. It’s also fun to use white or milk chocolate for the coating – these eggs are endlessly adaptable. Decorating them with colored sprinkles or edible glitter brings out the kid in everyone.
Tips For Shaping And Coating
If you ever find your hands sticky while shaping eggs, lightly dust your palms with powdered sugar. When dipping, use two forks to cradle the eggs gently – this helps keep their shape intact. If you work quickly while coating, the chocolate stays smooth and doesn’t pool at the base.
- Don’t let the chocolate get too hot or it can seize and become grainy.
- Let the eggs firm up completely before packaging so they don’t stick together.
- Start with small batches to practice shaping if you’re making these for the first time.
 Save
Save Making these eggs is a joyful, low-stress kitchen adventure. No matter how untidy the process, sharing homemade treats always brings a smile.
Recipe FAQs
- → How should I melt the chocolate?
Use a microwave in short bursts or a double boiler to gently melt the chocolate, stirring frequently for a smooth consistency.
- → Can I use crunchy peanut butter?
Absolutely! Crunchy peanut butter adds a pleasant texture to the filling and enhances the flavor profile.
- → How long do these treats last?
Store eggs in an airtight container in the refrigerator for up to one week or freeze them for up to two months.
- → Are these suitable for gluten-free diets?
Yes, just ensure all ingredients, especially chocolate, are certified gluten-free to avoid cross-contamination.
- → What ingredients help achieve a smoother chocolate coating?
Adding coconut oil to the melted chocolate creates a silkier finish, but you can omit it for a thicker shell.
- → How should I serve these treats?
Serve chilled for a firm chocolate coating or at room temperature for a softer bite, depending on preference.