 Save
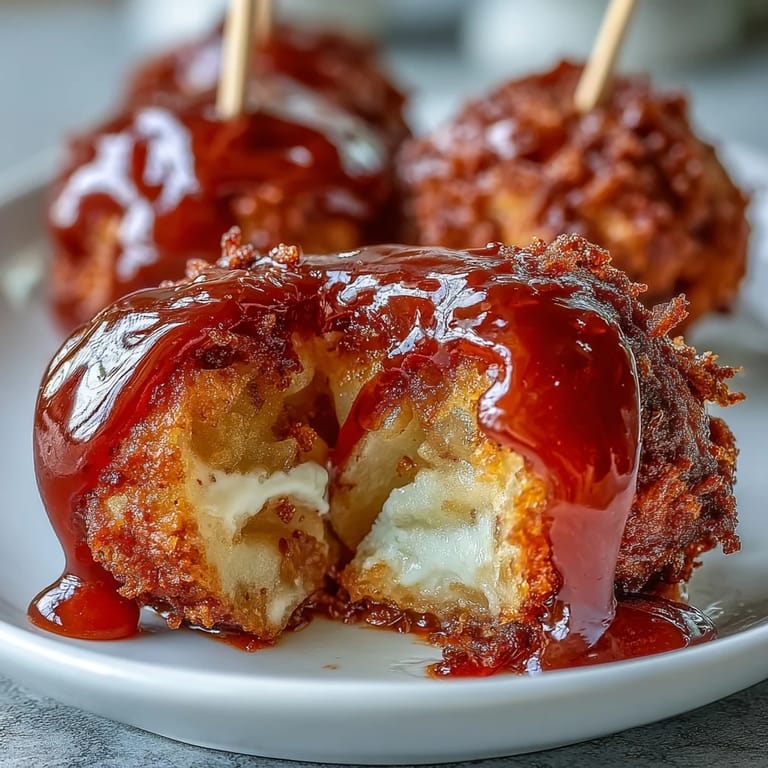
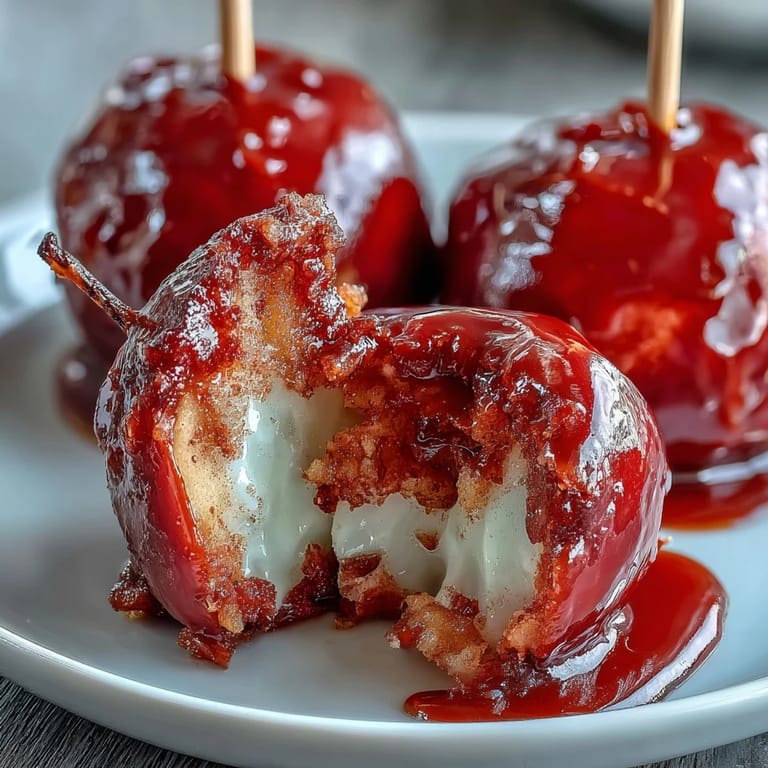
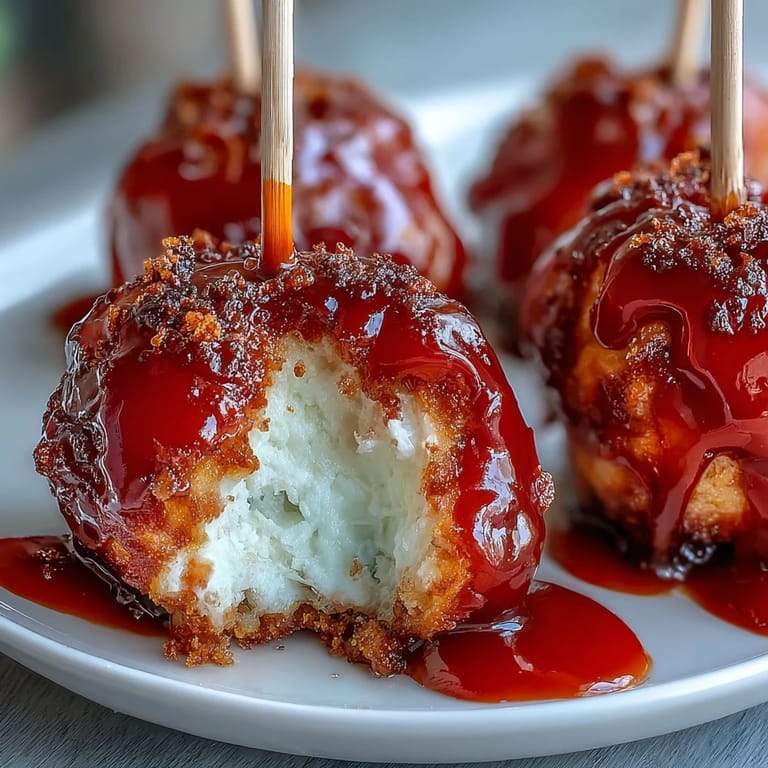
Save My daughter came home from school one afternoon asking why store-bought candy apples tasted nothing like the real thing. That question led me to dig through old cookbooks and experiment with candy temperatures until I finally cracked the glossy, snappy coating that made her eyes light up. These mini versions happened by accident when I realized full-sized apples were overwhelming for a weeknight snack, but bite-sized chunks with toothpick handles? Those became the unexpected star of every gathering I brought them to. There's something deeply satisfying about watching someone pick up one of these jewel-like bites and experience that satisfying crack as they bite through the candy shell.
I tested these on a random Tuesday when my partner's family was stopping by, and honestly I was nervous about the candy thermometer game. Watching my mother-in-law pick one up, hearing that satisfying crunch, and seeing her surprised smile told me everything I needed to know about whether this experiment was worth repeating.
Ingredients
- Crisp apples (Granny Smith or Fuji): The tartness cuts through the sweetness beautifully, and you want varieties that hold their shape rather than getting mealy when cut.
- Granulated sugar: This is your base for that shiny, hard candy shell that forms at exactly the right temperature.
- Light corn syrup: Don't skip this—it prevents crystallization and keeps your coating smooth instead of grainy.
- Water: Just enough to dissolve everything without thinning out your final candy.
- Red food coloring: Adds that classic candy apple look, though green works beautifully if you want something different.
- Nonstick cooking spray: Protects your parchment paper so nothing sticks where you don't want it to.
- Optional toppings (nuts, chocolate chips, sprinkles): These go on while the candy is still warm and tacky, sticking naturally without any extra effort.
Tired of Takeout? 🥡
Get 10 meals you can make faster than delivery arrives. Seriously.
One email. No spam. Unsubscribe anytime.
Instructions
- Set up your workspace:
- Line a tray with parchment paper and give it a light spray of nonstick spray so your finished bites slide right off later. Have all your tools within arm's reach because once that candy hits the hard crack stage, you're working against the clock.
- Prepare the apples:
- Wash and dry them thoroughly—moisture is your enemy when you're trying to get that candy to stick. Cut them into one-inch chunks, pat each piece completely dry with paper towels, then insert a toothpick into each chunk at a slight angle so it sits stable.
- Make the candy:
- Combine sugar, corn syrup, and water in a small saucepan and stir just until everything dissolves. Once you bring it to a boil over medium-high heat, resist every urge to stir—the friction will cause unwanted crystallization, and you'll end up with grainy coating instead of that glossy finish you're after.
- Watch for the hard crack stage:
- Clip your candy thermometer to the side of the pan and watch it climb to 300°F, which takes about seven to eight minutes. At this temperature, the candy will form hard, brittle threads when dropped into cold water, and that's exactly what you need.
- Add color and dip quickly:
- Remove the pan from heat, stir in your food coloring, and immediately start dipping—the candy cools fast and you don't want it setting up before you're finished. Work with confidence, swirling each apple chunk to coat completely, then let the excess drip back into the pan before placing it on your prepared tray.
- Finish while warm:
- If you're adding nuts, chocolate chips, or sprinkles, do it right now while the candy is still slightly tacky so they stick naturally. Wait much longer and you'll miss that window.
- Cool and set:
- Leave everything at room temperature until completely hardened—this usually takes fifteen to twenty minutes depending on your kitchen temperature.
 Save
Save There was this moment at a winter party when someone bit into one of these and the candy shell made this perfect crackling sound that cut right through the conversation. Everyone stopped what they were doing and asked what I'd brought, which was exactly the kind of simple kitchen magic I love.
The Temperature Game
Getting to the hard crack stage is everything here, and it's honestly not as intimidating as it sounds once you understand what you're watching for. The mixture will bubble and foam, then gradually turn from clear to a pale amber color as the water evaporates and the sugar concentrates. That 300°F mark is your target—go even ten degrees higher and you'll get candy so brittle it shatters at the slightest touch, fall short and you'll have chewy coating that sticks to teeth instead of cracking satisfyingly.
Apples Are Your Secret Weapon
The choice of apple matters more than you might think, and it's worth taking a second to pick the right ones at the store. Granny Smiths give you that sharp tartness that balances the sweet candy, while Fujis add a subtle honeyed note that changes the whole flavor equation. Whatever you choose, make sure they're firm and crisp—mealy apples will disappoint you, so give them a gentle squeeze to test before you bring them home.
The Creative Possibilities
Once you master the basic red version, the world opens up in the best way. I've experimented with green coloring for holiday parties, added edible gold leaf on top for special occasions, and even made a batch with crushed freeze-dried raspberries mixed into the candy for subtle flavor complexity. The toothpick format also means you can make these for any occasion without needing fancy presentation—they're elegant on their own.
- Try swirling two colors together right before dipping for a marbled effect that looks restaurant-quality.
- Dip half your batch in candy and half in melted white chocolate for variety on the same platter.
- Make these the day before a party and store them in an airtight container—they stay crisp and actually taste even better the next day.
 Save
Save These little bites have become my go-to when I want to bring something that feels special without spending all day in the kitchen. There's real joy in handing someone one of these and watching their face when they experience that perfect crack of the candy shell.
Recipe FAQs
- → What type of apples work best?
Crisp varieties like Granny Smith or Fuji hold their shape well and provide a tart balance to the sweet candy coating.
- → How do I achieve the perfect candy coating?
Boil the sugar mixture to the hard crack stage (300°F) and dip the apples quickly while coating is hot to ensure a smooth, glossy finish.
- → Can I add extra toppings?
Yes, sprinkling chopped nuts, mini chocolate chips, or sprinkles onto the candy coating before it hardens adds flavor and texture variety.
- → How should I prepare the apples for coating?
Core and cut apples into chunks, pat dry thoroughly to help the candy adhere and prevent slipping during dipping.
- → What precautions should I take with hot candy?
The candy mixture reaches very high temperatures, so handle with care to avoid burns and work swiftly while dipping.