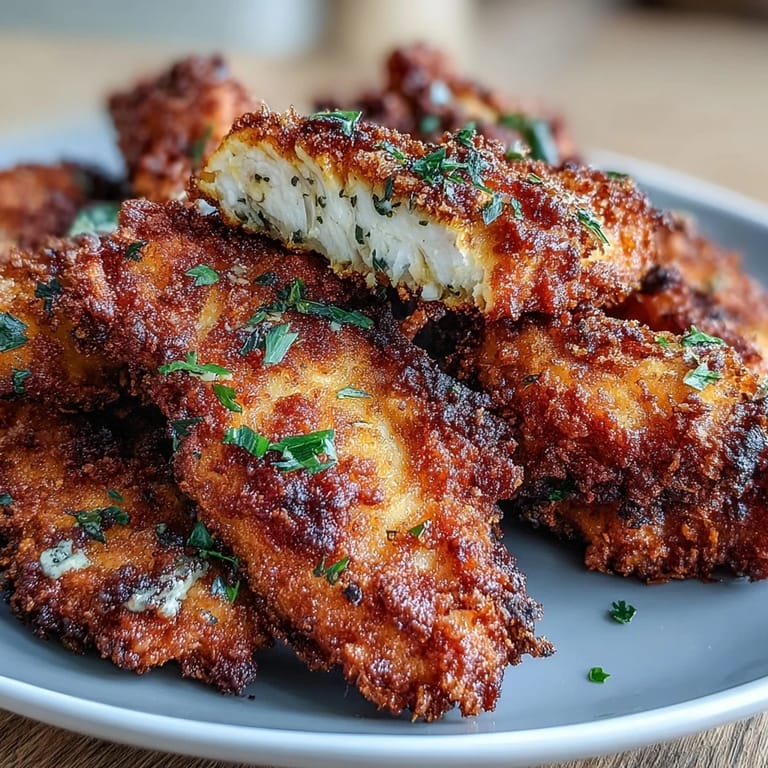
 Save
Save My neighbor brought over a plate of these one Sunday evening, apologizing for the turmeric stains on her fingers. I took one bite and immediately asked her to stop apologizing and start talking. The golden crust crackled perfectly, and the chicken inside stayed so tender I couldn't believe they were baked. She laughed and said she'd been making them every week since her kids refused to eat plain chicken anymore.
I made these for a potluck once, and three different people asked if I'd fried them in something special. Nope, just a quick spray of oil and a hot oven. One friend, who usually avoids anything golden or yellow, ate four pieces before admitting she thought turmeric only belonged in curry. That night I realized how a single spice could completely transform something as simple as chicken tenders into a conversation starter.
Ingredients
- Boneless, skinless chicken tenders or chicken breast strips (600 g): Tenders cook faster and more evenly, but if you only have breasts, just slice them into even strips so nothing overcooks.
- Plain yogurt (2 tablespoons): This tenderizes the chicken and helps the spices cling, if you use a dairy-free version, pick one that's thick and creamy.
- Olive oil (1 tablespoon plus more for cooking): Adds moisture to the marinade and helps achieve that crispy finish when you spray or brush it on before baking.
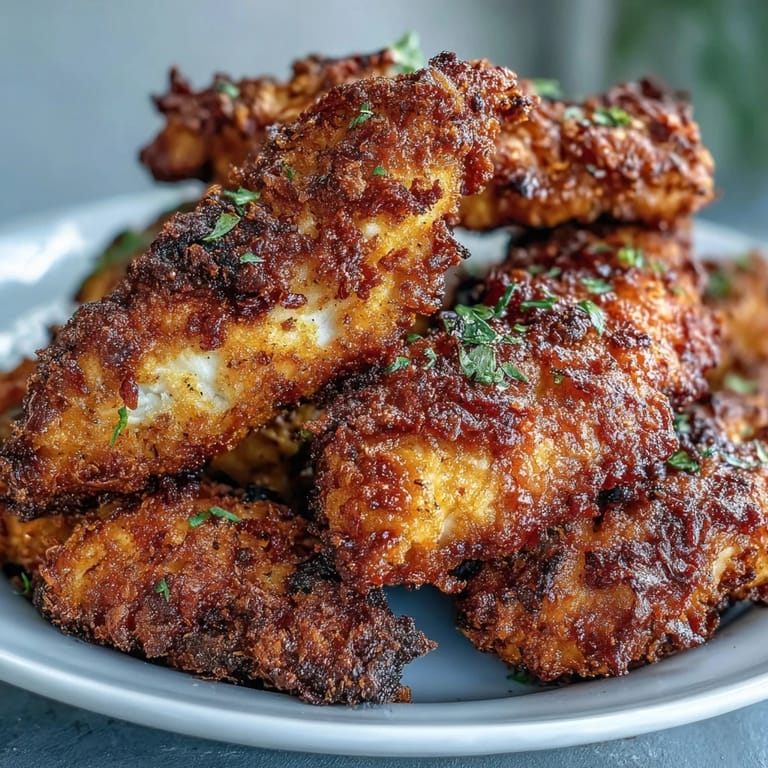
- Ground turmeric (2 teaspoons plus 1 teaspoon for breading): The star of the show, it brings color, earthy warmth, and a subtle peppery note that makes these tenders unforgettable.
- Ground cumin (1 teaspoon): Adds a smoky, slightly nutty depth that balances the turmeric beautifully.
- Garlic powder (1 teaspoon): Delivers savory punch without the hassle of mincing fresh garlic, and it distributes evenly in the marinade.
- Smoked paprika (1 teaspoon): Brings a gentle smokiness that makes people think you spent hours grilling.
- Black pepper (½ teaspoon plus ½ teaspoon for breading): Sharpens all the other spices and adds just enough heat to keep things interesting.
- Salt (¾ teaspoon plus ½ teaspoon for breading): Essential for bringing out every flavor, don't skip it in either the marinade or the breading.
- Panko breadcrumbs (120 g): The secret to that extra-crispy coating, regular breadcrumbs just won't give you the same crunch.
- All-purpose flour (60 g): Helps the breading stick and creates a light, crispy layer that seals in all the juices.
Tired of Takeout? 🥡
Get 10 meals you can make faster than delivery arrives. Seriously.
One email. No spam. Unsubscribe anytime.
Instructions
- Marinate the chicken:
- Whisk together the yogurt, olive oil, turmeric, cumin, garlic powder, paprika, pepper, and salt until smooth and fragrant. Toss the chicken strips in the marinade, making sure every piece is coated, then let them sit for at least 15 minutes or up to 2 hours if you want deeper flavor.
- Preheat and prep:
- Set your oven to 220°C (425°F) and line a baking sheet with a wire rack, or heat a few tablespoons of oil in a large skillet if you're frying. Either way, get everything ready before you start breading so you're not scrambling later.
- Mix the breading:
- Combine the panko, flour, turmeric, salt, and pepper in a shallow dish and stir until the color is evenly distributed. This golden mixture is what gives the tenders their signature crunch and color.
- Coat the chicken:
- Take each marinated strip and press it gently into the breadcrumb mixture, turning to coat all sides. Don't be shy, really press it on so it sticks and creates that thick, crunchy crust.
- Bake or fry:
- For baking, arrange the coated strips on the wire rack, spray lightly with oil, and bake for 18 to 20 minutes, flipping halfway through until golden and cooked through. For frying, cook in batches for 3 to 4 minutes per side, then drain on paper towels.
- Serve hot:
- Pull them out when they're crispy and golden, let them rest for just a minute, then serve with your favorite dipping sauce. They're best enjoyed while still warm and crunchy.
 Save
Save One evening, my youngest refused to try them because they looked different. I didn't argue, just set the plate down and kept eating. Five minutes later, she snuck one off my plate, took a bite, and asked why I didn't tell her they tasted like the good kind of chicken. Now she requests them by name, and I've learned that sometimes the best way to win someone over is to let the food speak for itself.
Getting That Perfect Crunch
The secret to truly crispy tenders is all about temperature and space. If you're baking, use a wire rack so hot air circulates around every side, and don't skip the oil spray. If you're frying, keep the oil hot enough that the chicken sizzles immediately when it hits the pan, but not so hot that the outside burns before the inside cooks. I learned this the hard way after serving a batch that looked gorgeous but was still raw in the middle, now I always check with a thermometer or slice one open to be sure.
Adjusting the Spice Level
These tenders are mild and family friendly as written, but you can easily turn up the heat. A pinch of cayenne in the marinade adds a slow building warmth, or try swapping the smoked paprika for hot paprika if you want a little more kick. I once accidentally added too much cayenne and had to serve them with extra yogurt dip, which actually turned into a happy accident because the cool, tangy dip balanced the heat perfectly. Now I always make a creamy dipping sauce, even when the tenders are mild.
Storing and Reheating
Leftover tenders keep well in the fridge for up to three days, but reheating them correctly makes all the difference. Skip the microwave, it turns the crispy coating soggy and sad. Instead, pop them in a 200°C (400°F) oven for about 8 minutes, or use an air fryer for 5 minutes to bring back that just-cooked crunch. I've even packed cold tenders in lunchboxes, and they still get eaten happily, though they're never quite as magical as when they're hot and fresh.
- Store in an airtight container with a paper towel to absorb any moisture.
- Reheat on a wire rack or in an air fryer to keep the coating crispy.
- Freeze uncooked breaded tenders on a tray, then transfer to a freezer bag for up to two months.
 Save
Save There's something deeply satisfying about pulling a tray of golden, fragrant chicken out of the oven and watching everyone's face light up. Whether you're feeding kids, impressing guests, or just treating yourself to something a little special on a weeknight, these tenders deliver every single time.
Recipe FAQs
- → Can I make these chicken tenders in an air fryer?
Yes, air fry at 200°C (400°F) for 12-15 minutes, flipping halfway through. Spray lightly with oil for best crispiness.
- → How do I make these gluten-free?
Substitute all-purpose flour with rice flour or gluten-free flour blend, and use gluten-free breadcrumbs instead of panko.
- → Can I prepare these ahead of time?
Absolutely. Marinate the chicken up to 24 hours in advance. You can also bread them a few hours ahead and refrigerate until ready to cook.
- → What dipping sauces pair well with turmeric chicken tenders?
Try yogurt-herb dip, sweet chili sauce, honey mustard, or garlic aioli. The warming spices complement both creamy and tangy sauces beautifully.
- → How do I ensure the chicken stays crispy?
Use a wire rack when baking to allow air circulation. For reheating, use an oven or air fryer rather than microwave to maintain the crispy coating.
- → Can I use chicken breast instead of tenders?
Yes, cut boneless chicken breast into even strips about 1-inch thick. Cooking time may vary slightly depending on thickness.