 Save
Save My grandmother kept a worn recipe card for red velvet cake in a tin box, its edges soft from decades of flour dust and sticky fingers. She never wrote down the quantities, just notes scribbled in the margins: "more vinegar than you'd think" and "don't you dare overmix." I spent years watching her make it, never quite understanding the magic until I realized it wasn't about following rules—it was about feeling the batter transform under the mixer, watching that impossible red deepen, knowing exactly when to stop.
I made this for a Valentine's dinner once when everything else had fallen apart, and I remember standing in the kitchen at midnight, whisking frosting while my hands shook slightly, thinking that at least I could get this one thing right. When I pulled those perfect layers from the oven and they came out golden and level, I felt something shift. Somehow, that cake made the whole evening feel salvageable.
Ingredients
- All-purpose flour: Measure by spooning into your measuring cup and leveling off—scooping directly lets you pack in too much, which dries out the cake.
- Unsweetened cocoa powder: This isn't about making chocolate cake; it's just enough to give the cake depth and keep the red from looking artificial.
- Baking soda and salt: These are your secret weapons for making the red pop and preventing the cake from tasting flat.
- Unsalted butter: Room temperature is non-negotiable—cold butter won't cream properly and you'll end up with a dense crumb.
- Granulated sugar and eggs: Beat them long enough that the mixture looks pale and almost fluffy, which incorporates air and keeps the cake tender.
- Buttermilk: The tang is essential; regular milk won't give you that subtle complexity.
- Red food coloring: Gel food coloring gives a deeper, more luxurious red than liquid, and you need less of it.
- Vegetable oil: This keeps the cake moist in a way butter alone can't; the combination of both is what makes this work.
- Cream cheese and butter for frosting: Both must be softened so they combine into something silky, not grainy.
Tired of Takeout? 🥡
Get 10 meals you can make faster than delivery arrives. Seriously.
One email. No spam. Unsubscribe anytime.
Instructions
- Heat your oven and prep your pans:
- Set the oven to 350°F and give it a few minutes to reach temperature. Grease two 9-inch round pans generously, then dust with flour—tap out the excess so it's just a light coating.
- Sift your dry ingredients:
- Combine flour, cocoa powder, baking soda, and salt in a medium bowl. Sifting is the one step that actually matters here; it ensures everything is evenly distributed.
- Cream your butter and sugar:
- Beat them together in a large bowl for about 3 minutes until the mixture is noticeably lighter in color and fluffy. This is where air gets incorporated into the cake.
- Add eggs one at a time:
- Drop in one egg, beat until it disappears completely, then add the next. This slow incorporation keeps the batter from breaking.
- Add oil, vanilla, and vinegar:
- Mix these in until just combined. The vinegar reacts with the baking soda to give the cake its tender crumb and subtle tang.
- Combine buttermilk with red food coloring:
- Stir them together in a small bowl until the color is even and vibrant. If you want deeper red, use gel coloring instead of liquid.
- Alternate wet and dry ingredients:
- Add about a third of the dry mixture, then half the buttermilk mixture, another third of dry, the rest of the buttermilk, and finally the last of the dry ingredients. Stop mixing the moment everything is combined—overmixing develops gluten and makes the cake tough.
- Divide and bake:
- Pour batter evenly into both pans and bake for 28 to 30 minutes, until a toothpick inserted in the center comes out clean. The cakes should spring back slightly when touched.
- Cool properly:
- Let cakes rest in their pans for 10 minutes, then run a knife around the edges and turn them out onto wire racks. This prevents the bottoms from getting soggy.
- Make the frosting:
- Beat softened cream cheese and butter together until completely smooth and creamy. Gradually add powdered sugar (sift it first or it gets lumpy), vanilla, and salt, beating until fluffy and light.
- Frost when completely cool:
- Rushing this means warm cake will melt the frosting into puddles. Place one cake layer on a serving plate, spread frosting over the top, then add the second layer and frost the entire outside.
 Save
Save Years later, when my own daughter asked me to teach her this recipe, I realized that red velvet cake isn't really about the ingredients at all. It's about watching someone you love figure out that patience and attention matter, that good things take a little time and care. She made hers slightly imperfect, lopsided in one spot, but when we bit into it together, it was the best cake either of us had ever tasted.
Understanding Red Velvet
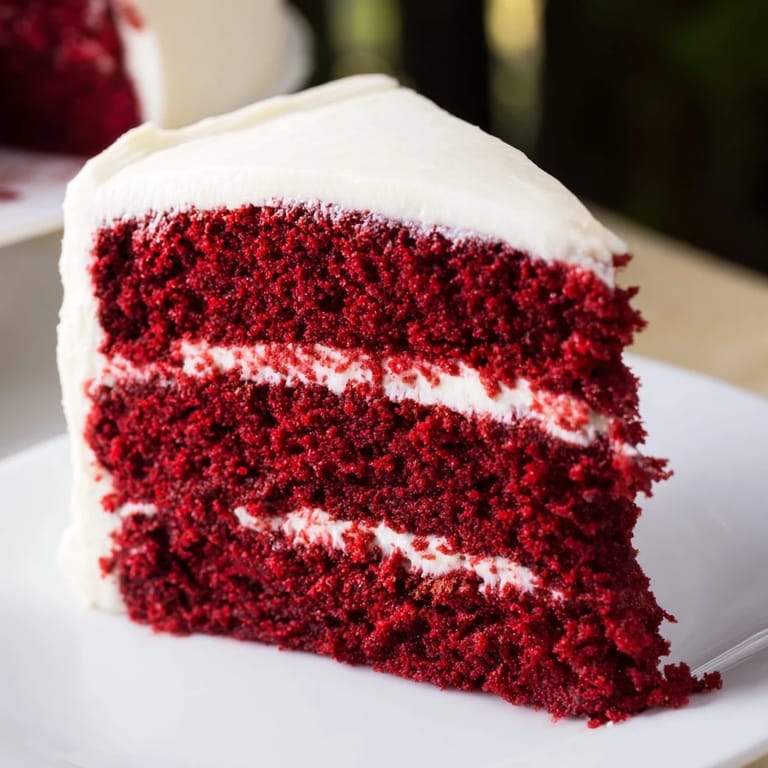
Red velvet has spent decades caught between being a chocolate cake and being something entirely its own. The truth is it's neither—it's a vanilla cake with just enough cocoa to taste sophisticated, colored a vivid red, and finished with cream cheese frosting that feels almost luxurious. The subtlety is intentional, which is why so many homemade versions go wrong. People use too much cocoa, thinking more flavor is better, or they skip the vinegar because it seems odd, or they let the mixer run too long. The magic is in restraint.
The Science of the Crumb
The combination of oil and butter is what makes this cake stay moist for days. Butter brings flavor and helps create structure, but oil keeps things tender and prevents the cake from drying out the way pure butter cakes sometimes do. The buttermilk and vinegar team up to react with the baking soda, which creates a tender crumb and that almost imperceptible tang that keeps the sweetness from feeling cloying. Every single ingredient earns its place.
Serving and Storing Secrets
This cake actually tastes better the next day when the flavors have settled and the frosting has firmed up slightly. Serve it cold straight from the refrigerator, and cut your slices with a hot, damp knife cleaned between each cut—that's how bakeries get those clean edges. This cake pairs beautifully with coffee, sparkling wine, or honestly just eaten alone with a fork while standing at the kitchen counter at an odd hour.
- Store covered in the refrigerator for up to five days, and it will stay moist and perfect the entire time.
- You can make this cake a day ahead; just frost it the morning of serving for the best texture and taste.
- If you want to garnish, a sprinkle of red velvet cake crumbs or fresh berries makes it look intentional and special.
 Save
Save This cake has shown up at birthdays, Valentine's dinners, and quiet mornings when I just wanted to feel like I was doing something meaningful. It's the kind of dessert that reminds you why we bake in the first place.
Recipe FAQs
- → What gives the cake its signature red color?
The vibrant red color comes from red food coloring blended into the batter, which enhances the rich cocoa base.
- → How does buttermilk affect the cake texture?
Buttermilk adds moisture and a slight tang, which helps create a tender crumb and balances the sweetness.
- → Can I use gel food coloring instead of liquid?
Yes, gel food coloring is recommended for a deeper, more intense red color without adding extra liquid.
- → What is the role of vinegar in this cake?
White vinegar reacts with baking soda to help the cake rise and also enhances the tender texture and flavor depth.
- → How should the cake be cooled before frosting?
Allow the cakes to cool in the pans for about 10 minutes, then transfer them to a wire rack to cool completely before frosting.